Set up a SAML identity provider as the single sign-on source for Salesforce
Single sign-on (SSO) lets users sign in to Salesforce with one set of corporate credentials, which removes user-managed passwords and reduces phishing risk. In this guide Salesforce acts as the service provider (SP) and your SAML identity provider (IdP) authenticates users, typically against your existing directory.
Prerequisites#
- System administrator access to Salesforce.
- A SAML 2.0 identity provider reachable over HTTPS with a public DNS name and a valid TLS certificate, for example
sso.example.com. - Administrator access to the IdP, with permission to create SAML applications and manage signing certificates.
- Your Salesforce My Domain URL (for example
https://example-dev-ed.my.salesforce.com). SP-initiated sign-in requires My Domain to be deployed. - User accounts that exist in both systems, where the value the IdP sends as the NameID matches the user's Salesforce username (or Federation ID, if you choose that identity type).
Configure the identity provider#
Create a SAML application for Salesforce in your IdP. The exact menu names differ between products, so use the values below in the equivalent fields.
Step 1: Sign in to Salesforce at https://login.salesforce.com as a system administrator and note your My Domain URL and your org details.
Step 2: Create a new SAML 2.0 application (or SSO profile) in your IdP and name it, for example, "Salesforce".
Step 3: Enter the service provider values for your org. Replace example-dev-ed with your My Domain name and sso.example.com with your IdP host name.
ACS (Assertion Consumer Service) URL : https://example-dev-ed.my.salesforce.com
Single Logout URL (optional)         : https://example-dev-ed.my.salesforce.com/services/auth/sp/saml2/logout
Audience / SP Entity ID              : https://saml.salesforce.com
Issuer (IdP Entity ID)               : https://sso.example.com
NameID format                        : Unspecified or email address
NameID value                         : The user's Salesforce username (user@example.com)
Assertion signing : Sign the assertion with the IdP signing certificateStep 4: Assign the application to the users or groups who should be able to sign in to Salesforce.
Step 5: Make sure the IdP has a signing certificate and export the public certificate in PEM or CER format, for example as IdP_Signing_Certificate.cer. Do not export or share the private key.
Step 6: Note the IdP sign-in URL and sign-out URL for this application. They look like the following, but your product may use a different path.
Sign-in page URL  : https://sso.example.com/saml-sso/salesforce
Sign-out page URL : https://sso.example.com/saml-slo/salesforce
Configure Salesforce#
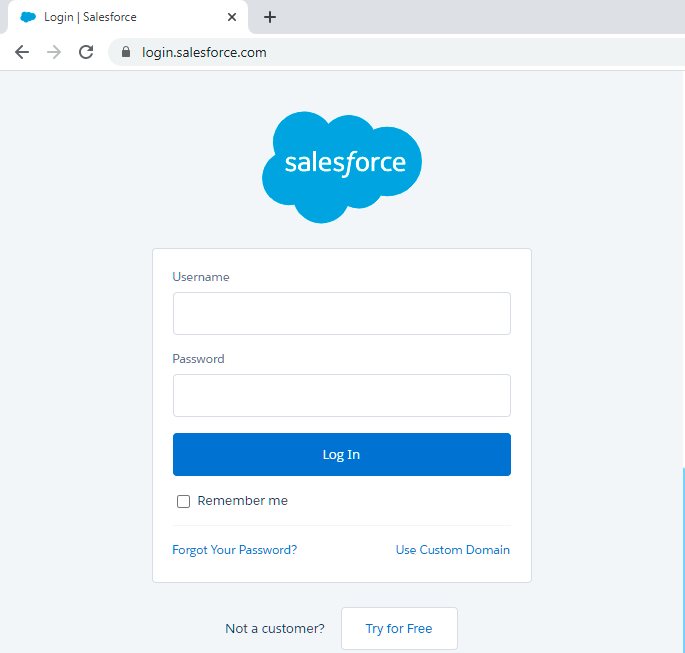
Step 1: Go to https://login.salesforce.com or your My Domain URL and sign in with administrator access.
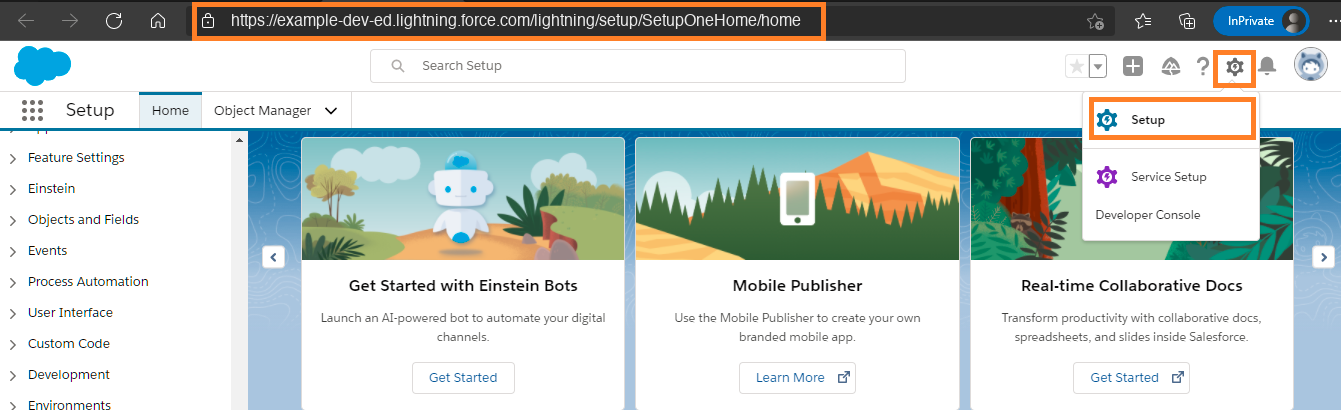
Step 2: After you sign in, click the gear icon and select Setup.
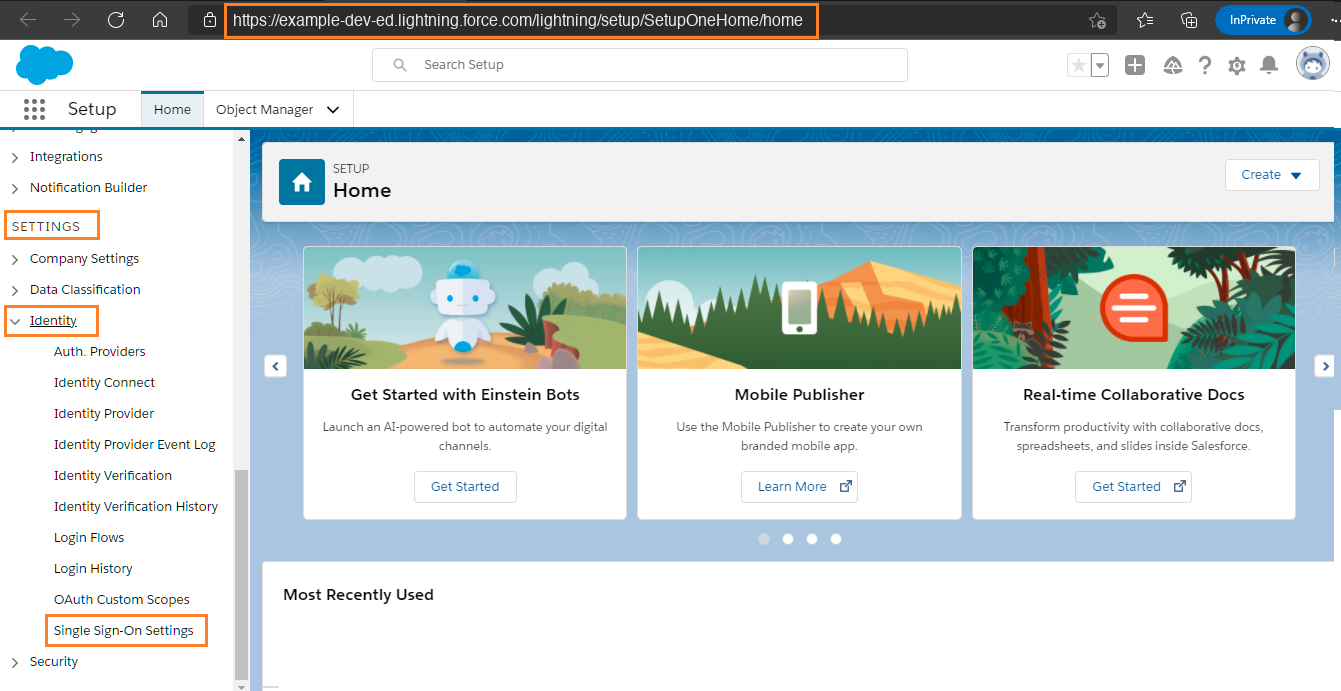
Step 3: In Setup, go to Settings > Identity > Single Sign-On Settings.
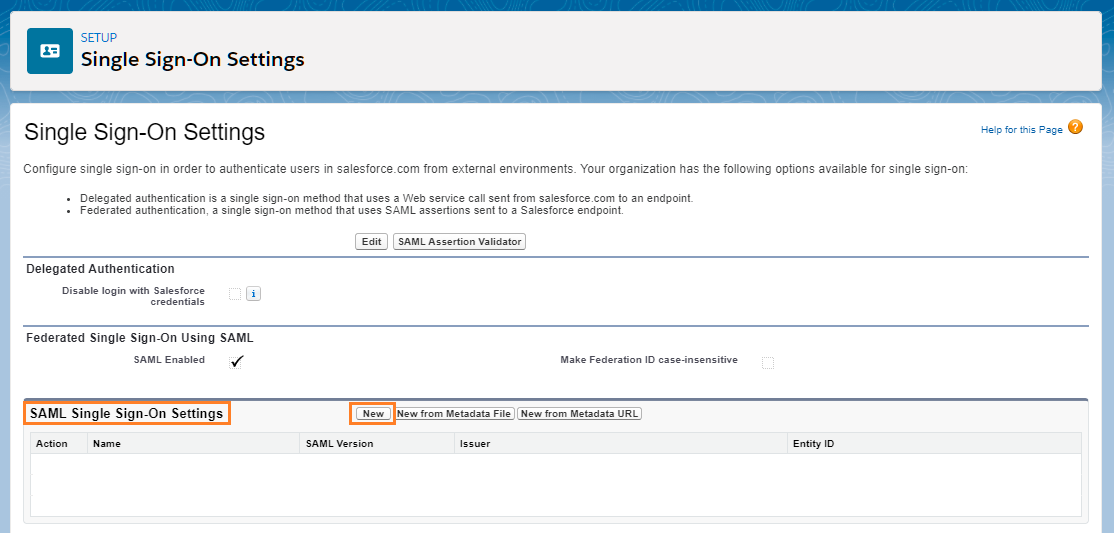
Step 4: Under SAML Single Sign-On Settings, click New. If your IdP provides a metadata file or URL, you can use New from Metadata File or New from Metadata URL instead.
Step 5: Fill in the required details and click Save.
Name: IdP_Server
API Name: IdP_Server
SAML Version: 2.0
Issuer: https://sso.example.com                  (replace with your IdP Entity ID)
Entity ID: https://saml.salesforce.com
Identity Provider Certificate: upload the IdP signing certificate
Request Signature Method: RSA-SHA256
Assertion Decryption Certificate: Assertion not encrypted
SAML Identity Type: Assertion contains the User's Salesforce username
SAML Identity Location: Identity is in the NameIdentifier element of the Subject statement
Service Provider Initiated Request Binding: HTTP POST
Identity Provider Login URL: https://sso.example.com/saml-sso/salesforce
Custom Logout URL: https://sso.example.com/saml-slo/salesforce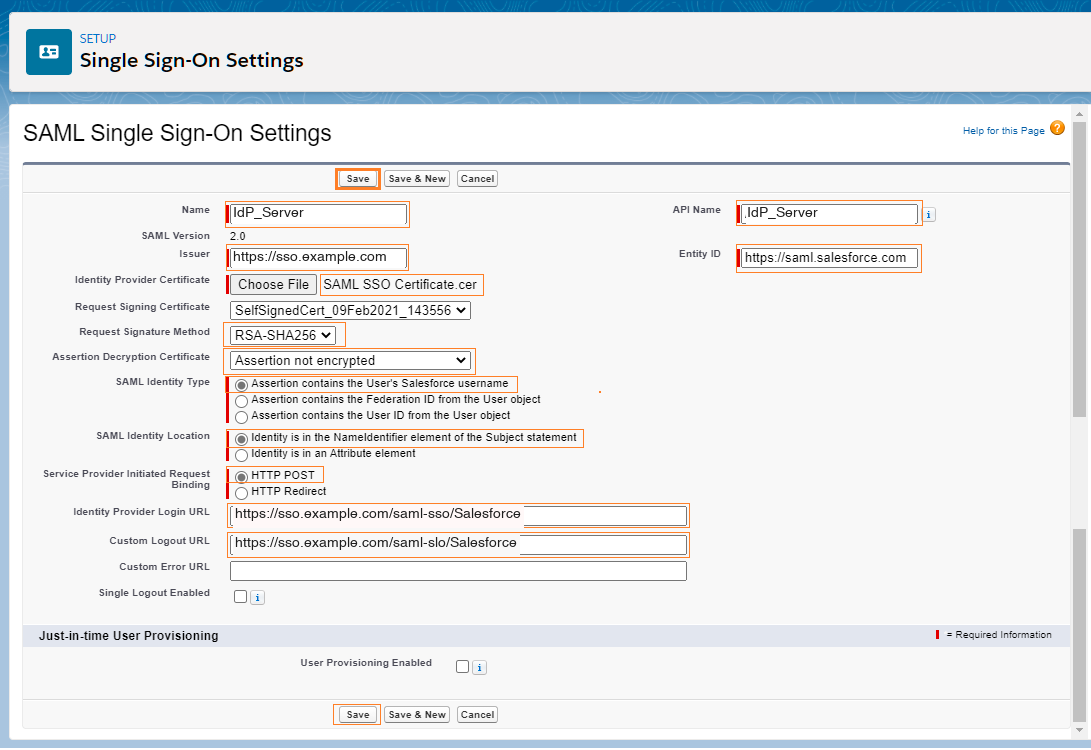
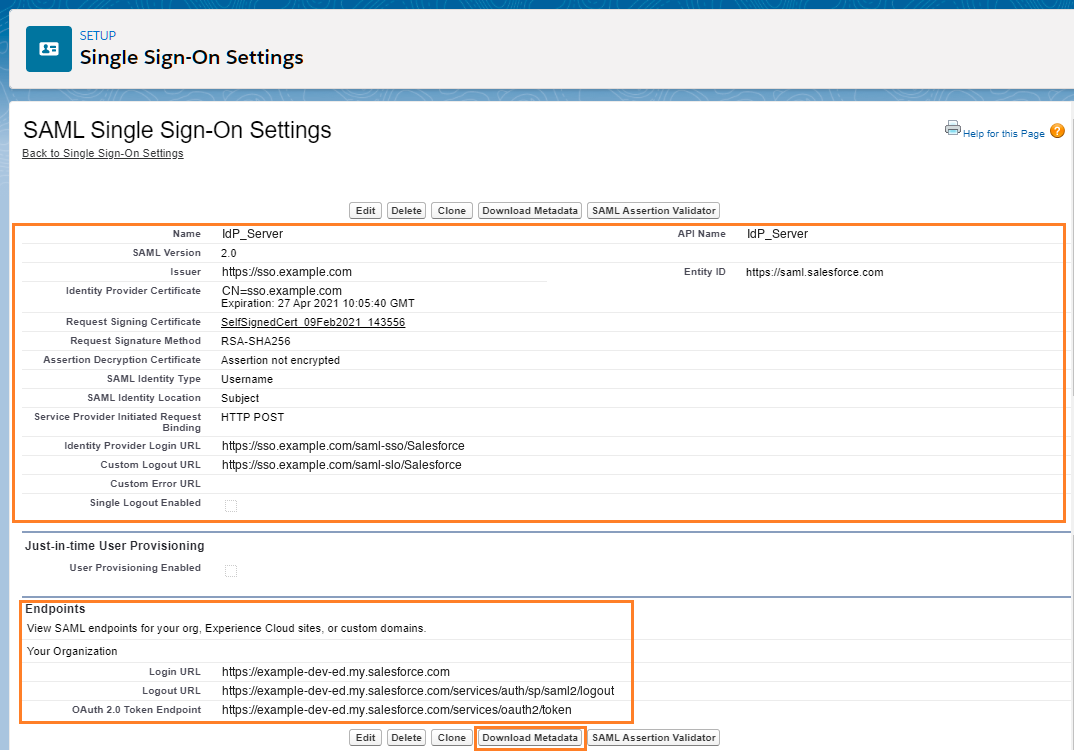
Step 6: Review the saved settings and the endpoint details of your org.
The Endpoints section lists the Login URL and Logout URL for your org. Use these in the IdP if they differ from the values you entered earlier. Click Download Metadata to get the service provider metadata, which many IdPs can import to fill in the Entity ID and ACS URL automatically.
Step 7: To let users sign in with the IdP from your My Domain login page, go to Settings > Company Settings > My Domain, open Authentication Configuration, and select the new SAML configuration as an authentication service. To make the IdP the only way to sign in, clear the Login Form option.
Test sign-in#
IdP-initiated sign-in#
Open the portal or application launcher of your IdP (for example
https://sso.example.com).Sign in with your corporate credentials and complete any multi-factor authentication your IdP requires.
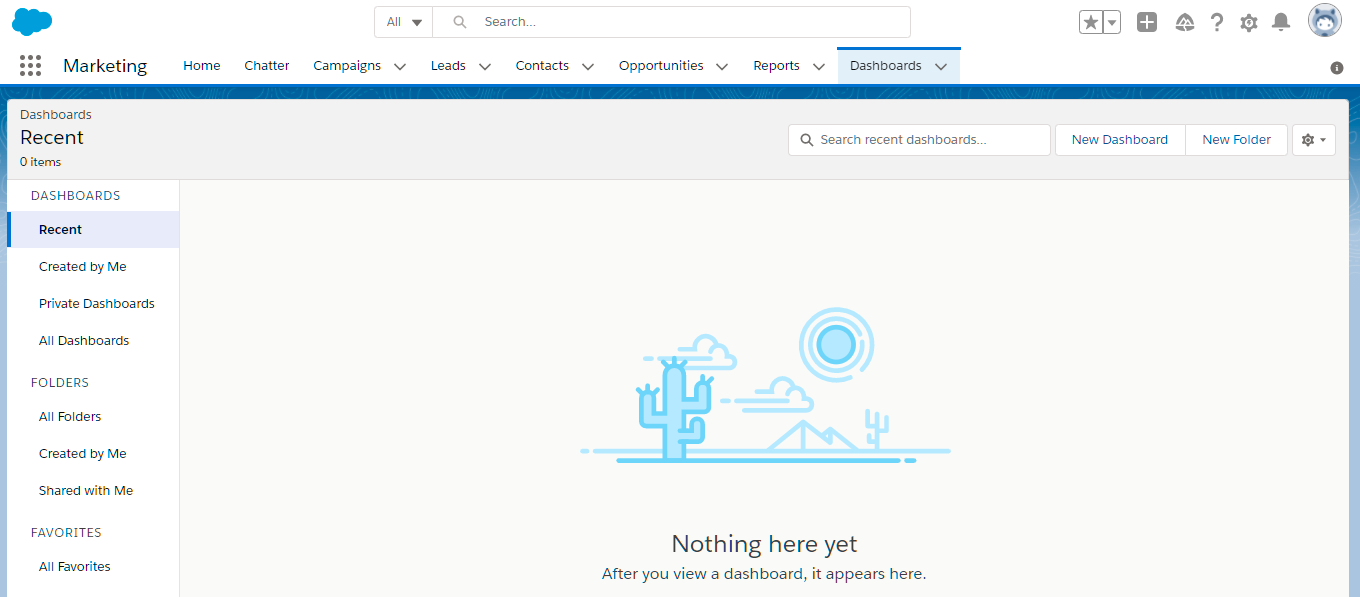
Select the Salesforce application tile. The IdP sends a signed SAML assertion to Salesforce and you land in Salesforce without a further password prompt.
SP-initiated sign-in#
Go to your My Domain URL, for example
https://example-dev-ed.my.salesforce.com, and select the identity provider button under Log In Using.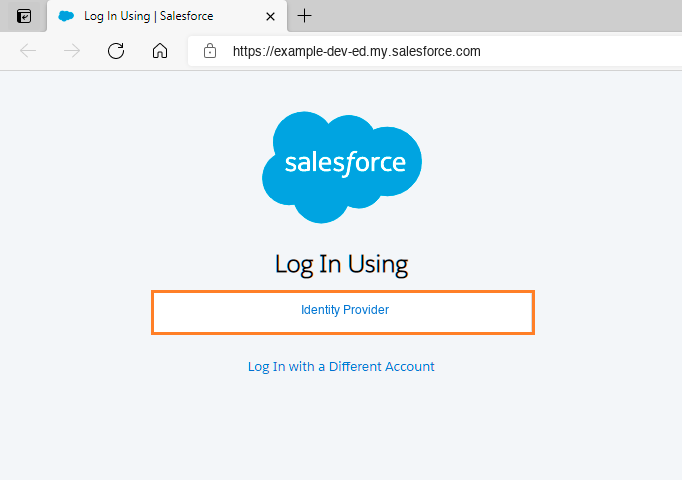
Salesforce redirects the browser to your IdP sign-in page. Enter your corporate credentials and complete multi-factor authentication if prompted.
After successful authentication the IdP redirects you back to Salesforce and your home page opens.
Troubleshooting#
- Login error "We can't log you in because of an issue with single sign-on": open Setup > Identity > Login History and read the SAML error. Use the SAML Assertion Validator on the Single Sign-On Settings page to test a captured assertion.
- Invalid issuer or signature: the Issuer in Salesforce must exactly match the IdP Entity ID, and the uploaded certificate must match the key that signs the assertions.
- User not found: the NameID sent by the IdP must match the user's Salesforce username (or Federation ID).
- Clock skew: make sure the IdP server uses synchronized time (NTP).
- Use a SAML tracer browser extension to inspect the request and response when diagnosing sign-in problems.